Marshi Huneycutt
  • Work
    • Small
    • Large
  • Student Art at Stackhouse Art Center
  • Assignments

AP Photo - 12 Corners                                     due Thursday, October 29, 2015

10/27/2015

 
Students, find a definition for "corner," and take 12 interesting images of corners.  Use different effects in Photoshop to render an interesting, creative photo of each corner.  Let the slideshow below inform your work.

Tangent Lines (sort of) Sketchbook Assignment             due Friday, October 23, 2015

10/15/2015

 
Picture
Picture
Week 8 Sketchbook Assignment - due Friday, October 23, 2015
 
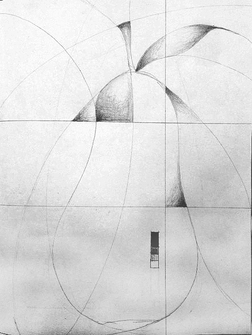
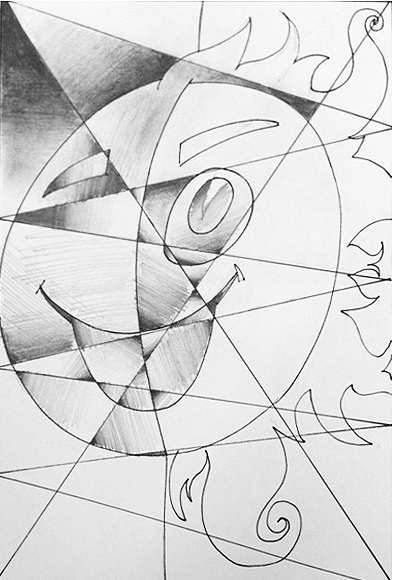
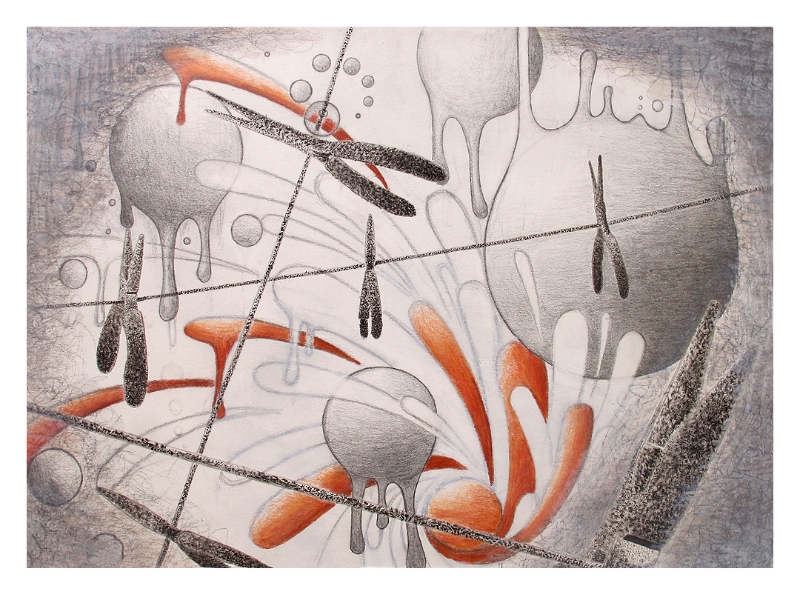
For this assignment we will be using a pencil to draw the outline of one large object on our paper and fracture the background.
  • Draw a 1/2-inch border around the paper.
  • Draw the outline only (contour) of one object.  No details.  This should be a fairly large object but must not reach the border.
  • Draw curved or straight lines that begin at the edges of the object and continue off the paper.
  • Add two full length horizontal lines me two full length vertical lines.  Use your own aesthetic (according to your personal sense of beauty and design) judgment when placing these lines.
  • Draw a small, five-block gray scale in some area of this artwork.
  • Shade in each fractured area with a soft pencil, being sure all five values of the pencil used in the grayscale are represented. 

AP Photo Layering Project                                 due Thursday, October 15, 2015

10/11/2015

 
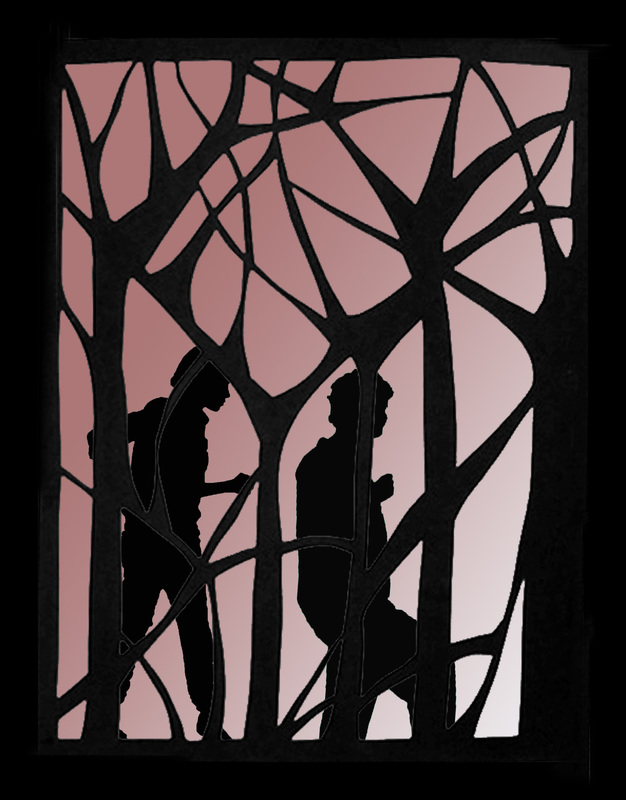
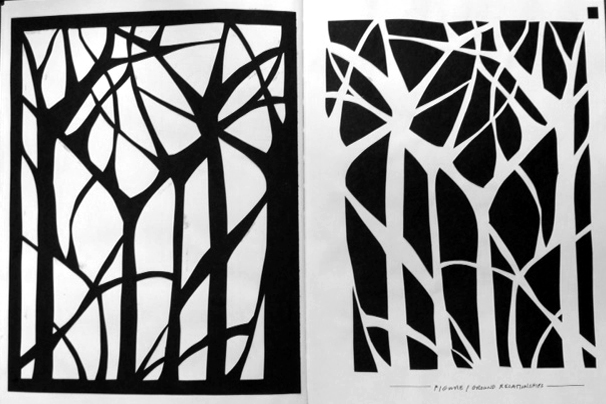
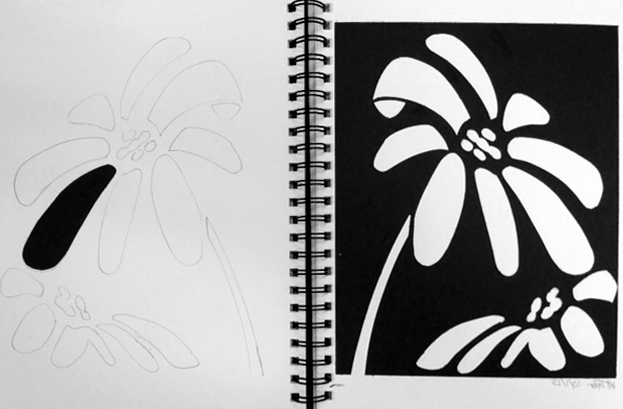
Follow written directions to combine your black and white cut paper sketchbook assignment from last week  with some of your silhouettes to make a new artwork.  Silhouettes below courtesy of Wildor A. and Junior P.
Picture
Picture
Picture
Picture

AP Photo - Silhouettes                                     due Friday, October 9, 2015

10/4/2015

 
This week we will create a series of three silhouettes.  Photograph your partner in three poses, and follow these directions to create three, expressive artworks.  Due Friday, October 9, 2015.
Picture

Take several photos of your partner in active poses.  No need to do Photoshop Lesson I on these; however, you will need to resize the image, making the largest size 10 inches and resolution 180.

Use the quick selection tool (4th) in toolbox) to select the figure. Choose the paintbrush tool (8th) to color over the figure that now has marching ants around it, turning it black.


Picture
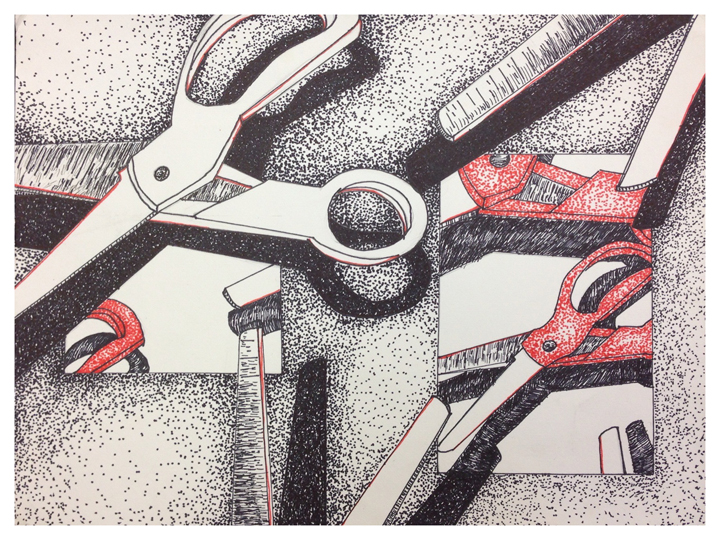
CTRL+c to copy the figure.
File>new>8.5 x 11 inch document.
Add a new layer by clicking layer>new in the options line at the top of the work space.
CTRL+v to paste in the black figure.
Switch the foreground to a color of your choice.  Select the background layer in the layers palette. Choose the paint bucket tool (12th) to fill the white space with your selected color.  Voila!  
Two more to go, and upload these to your OneDrive account.


See me, Rachel B. (7th period), Michael B., or Dana K. (1st period) if you need assistance. 

Color Mixing . . .

10/4/2015

 
Picture
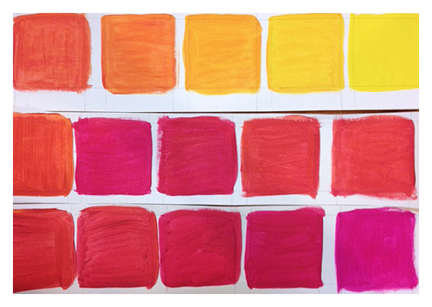
We mixed yellow and magenta . . .
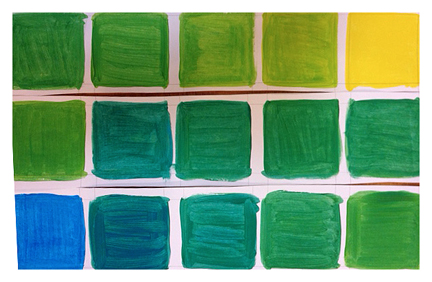
Picture
yellow and blue . . .
Picture
and magenta and blue to make this . . .
Picture
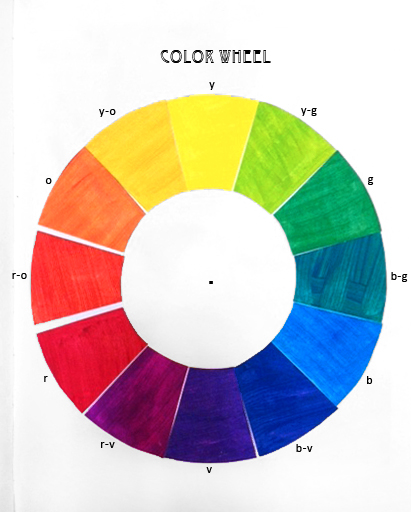
our very own color wheels. Great job, artists!

AP Drawing - Negative Space

10/3/2015

 
Let's spend this week filling in some of the negative space in our tool drawings, watercolors, and charcoal pieces.  Let these samples inform your artwork.
Picture
Jacob, c/o 2012
Picture
Jacob, c/o 2012
Picture
Celeste, c/o 2013

Art 2-D, Level I - Color Relationships

10/3/2015

 
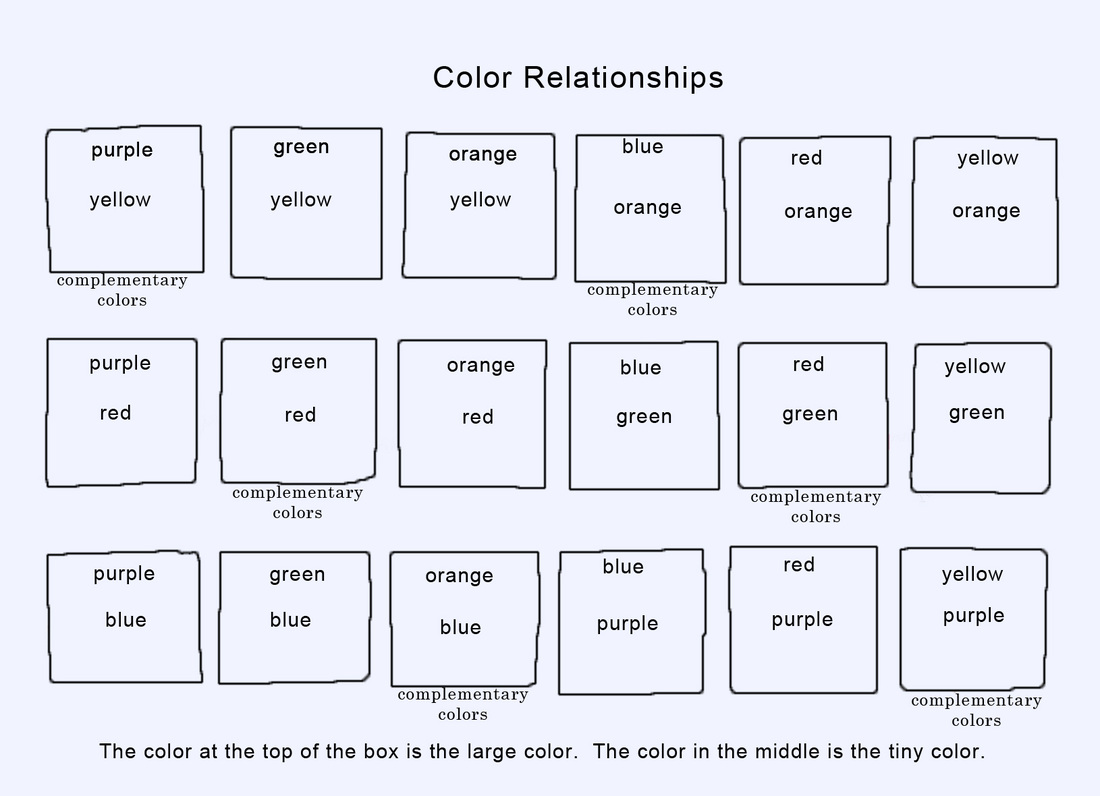
Using your extra color chips, please create a color swatch sheet that looks like this.  This is due Friday along with your sketchbook assignment (see the post below).
Picture
Picture

Figure/Ground Relationship Sketchbook Assignment, due Friday, October 9, 2015

10/2/2015

 
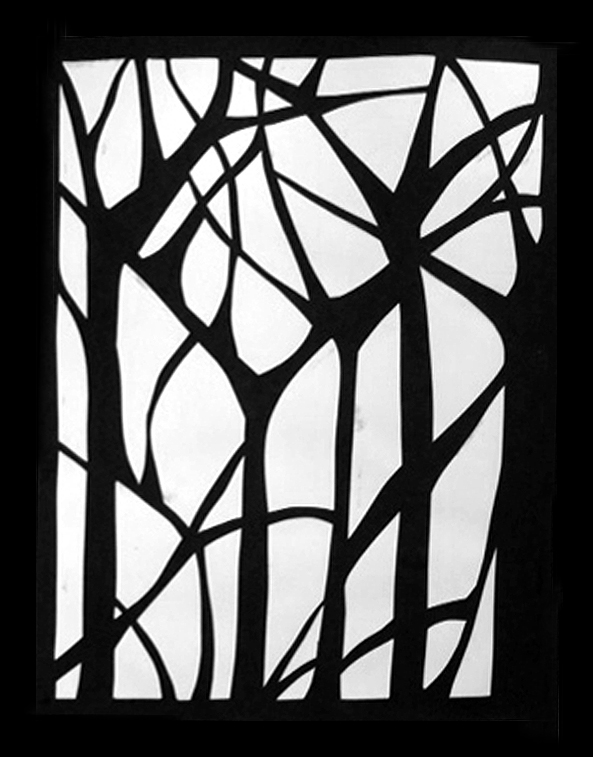
This week we will focus on positive and negative space in our weekly sketchbook assignment.  Follow this process to create an artwork from black construction paper.
  • google "black and white cut paper" in google
  • draw a design you would like to work with on xerox or scrap paper
  • get teacher's approval
  • draw out approved design on 8 x 10-inch black construction paper
  • cut out design with x-acto knife with cutting board underneath
  • trace cut out design in sketchbook
  • glue tiny black pieces into the traced design
  • glue the larger  black cut out onto the opposite page
Picture
Picture

    Archives

    August 2019
    April 2019
    March 2019
    February 2019
    January 2019
    December 2018
    November 2018
    October 2018
    September 2018
    August 2018
    May 2018
    December 2017
    November 2017
    October 2017
    August 2017
    May 2017
    April 2017
    March 2017
    February 2017
    January 2017
    December 2016
    November 2016
    October 2016
    May 2016
    April 2016
    March 2016
    February 2016
    January 2016
    December 2015
    November 2015
    October 2015
    September 2015
    August 2015
    May 2015
    April 2015
    March 2015
    February 2015
    October 2014
    July 2013
    June 2013

    Ideas

    This is a space for answering student and reader questions, explaining techniques and assignments, and sharing thoughts on art and computer science-related subjects.

    Studio Policy

    No personal electronic devices visible in the art classrooms.  No headphones, earbuds, or headphones allowed.  Art and computer science students are on task at all times.

Powered by Create your own unique website with customizable templates.